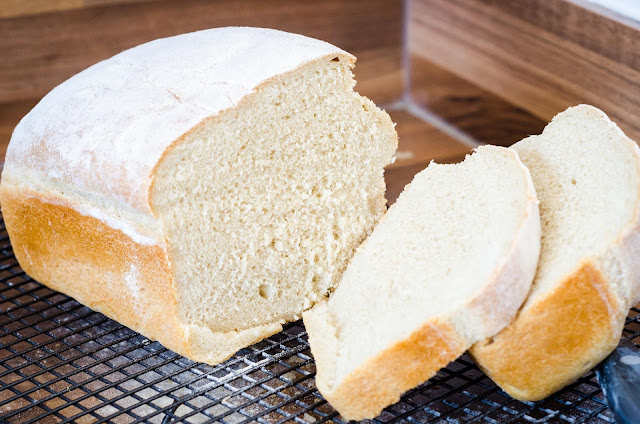
Bread is something which intimidates me a little. Even though it is a little intimidating for me, the nice thing about bread is that all dough starts with flour and water, and basic recipes have very little else added to it. Despite the nerves then, I've given it a go several times over the last couple of weeks trying to tinker with a recipe for white bread and try to get it perfect.
The crumb texture of this bread is a little closer than the grocery store variety, but it is still a light loaf and it has way more taste. And there is absolutely nothing like the smell of bread as it bakes and a slice of still-warm bread slathered in butter. It's worth the little extra work.
If you haven't read
my post on cinnamon rolls, there are a few steps to know about making bread before you start:
- Making the dough: salt and temperature kill yeast. So don't add the salt directly to the yeast and make sure the water is never hot.
- Kneading: Basically just move the dough. There's no right way to do it. I push it forward, away from me with the heel of my hand, bring it back to me by folding it over, and then push it away again. Kneading distributes water evenly throughout the dough and develops the gluten. Make sure you knead until the dough bounces 3/4 the way back when pressed lightly with your finger.
- Rising: This allows the yeast to do its magic and ferment the dough. Dough should rise until double its size.
- Knocking back: This step breaks the air bubbles and allows them to re-form in the desired shape in the tin.
- Proving: The second rising. Allows the gluten to finish developing and the crumb texture of the bread to reform the way you want it. Proving is finished when the dough does not spring back when you press your finger lightly into the top.
- Baking: Always, always put bread into a pre-heated, hot oven. Baking time may vary a little depending on your oven, so use your senses to tell when its done. Bread typically sounds hollow when it finished when you tap it on the bottom.

White Bread
Hands on time mixing the dough:15 minutes
Rising time: 1.5 hours
Baking time: 35-40 minutes
Ingredients:
500g strong white flour
10g fast action yeast
10g salt
350ml warm water
Place the flour in your bowl. Measure the yeast to one side of the bowl and the salt to the other. Add 250ml of the water and mix with a butter knife or wooden spoon. Add additional water by 25ml increments until you get dough that is tacky, but not sticky.
Note: You may not need all the water.
Tip the dough out onto your work surface. You shouldn't need flour, but if it's sticking a bit, you can lightly flour your work top. Knead your dough for 5-10 minutes until it springs back 3/4 of the way when you lightly press the top. Place in a lightly oiled bowl and cover with lightly oiled cling film. Let rise for 1 hour or until doubled in size.
Meanwhile, oil a 500g loaf pan. When the dough is risen, top out onto your work surface and knock back the dough by kneading again for 3-5 minutes. Shape into a loaf the length of your pan by rolling the dough a bit back-and-forth on your work top. Place into the tin, cover with the cling film, and let prove (second rise) for 30 minutes. The dough is ready when it does not spring back when you lightly press it with your finger.
While the dough is proving, heat the oven to 200ºC. When the dough is ready, dust lightly with flour and bake for 35-40 minutes. The bread is ready when you tip it out, and it sounds hollow when tapped on the bottom. If it doesn't sound hollow, put back in the pan and continue baking for 5 more minutes.


Comments
Post a Comment